Paper quilling
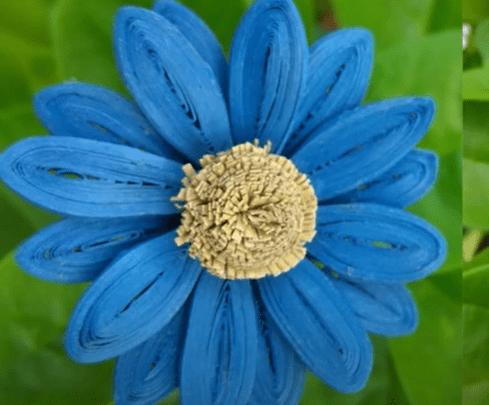
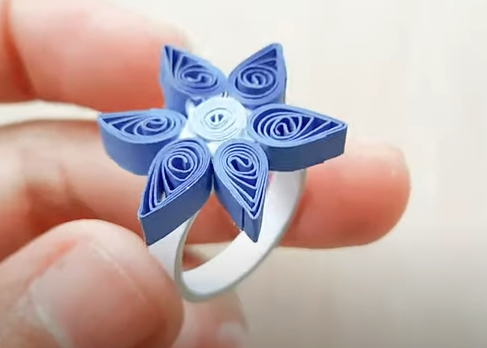
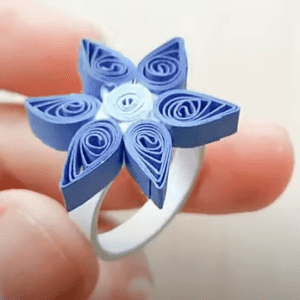
How To Make a Paper Quilling Daisy Flower
Make a beautiful flower from simple strips of paper
by; affanartandcraft.info updated on 22/05/24
Paper quilling
The skill of rolling, scrolling, and twisting paper strips into charming shapes is known as paper quilling, or paper filigree. Although quilling has been used since the 15th century, its popularity has not diminished over the centuries. This pastime creates stunning artwork quickly, is really inexpensive, and is very simple to learn. It makes sense why it has been well-liked for so long.
One of the most popular patterns in quilling is flowers, and the focus of this tutorial is on creating a basic daisy out of paper strips. You can quickly create more exquisite paper crafts if you know how to make the flower out of two paper forms.
If you are a complete newbie, you most likely already have the basic items you need at home. Of course, purchasing some basic quilling tools, such as pre-cut strips of paper, will make your flowers nicely coiled. However, you can always cut the paper strips by hand.
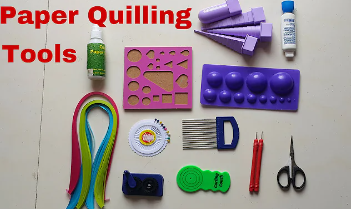
What You Will Need ;
- Equipment and Tools
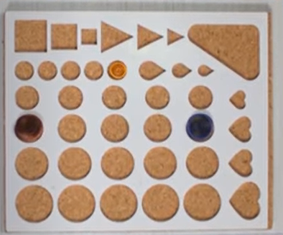
- Quilling board
- Slotted quilling tool
- Needle quilling tool.
- Toothpicks
- Scissors
- Paper trimmer/cutter (when cutting paper strips by hand)
- Craft glue
- Straight pins (optional).
- Hot glue is (optional).
- Tweezers (optional)
- Ruler (optional)Materials ;
- Paper for strips or pre-cut paper quilling strips roughly
- small flower pot (optional)
- Floral foam is optional.
- Thin wood dowels or wooden skewers (optional)
Instructions
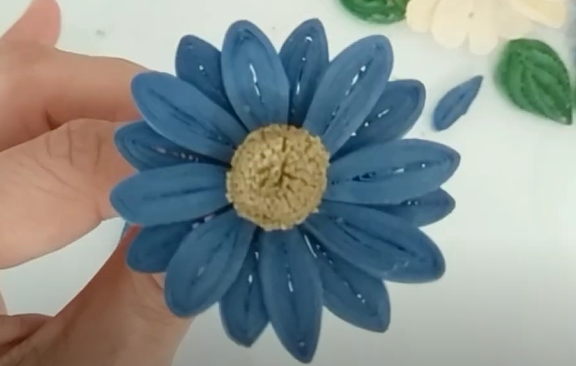
Construct the Daisy Petals
- Cut six white paper strips to construct the flower petals.
- Cut strips 3/8″ wide by 12″ long. If you are using pre-cut quilling paper strips, you may need to trim them down.
- To create a paper petal, first slide a piece of paper into the slot of the slotted quilling tool.
- Hold the tool in your hand between your thumb and index finger, then carefully turn it so the paper winds evenly around the tip.
- Pull the coil from the tool and arrange it in a circular on the quilling board. Allow the coil to unwind until it reaches the size of the round. Remove the paper coil, glue the end of the strip, and allow it to dry. You can then squeeze the paper coil into various forms.
 . Squeeze the paper coil into a teardrop shape.
- To shape a paper coil into a teardrop, gently draw the inside of the coil downwards and hold while pinching one edge of the circle to create a point. Your paper circle will now form a teardrop shape.
- Create 20 paper teardrop shapes to represent the petals of your quilled flower.. Make the center of the Daisy.
- To make the daisy’s center, you’ll need two colored paper strips (approximately 3/8 inch wide and 12 inches long) and a slotted tool.
- Thread one end of the paper strip into the slot and crank the tool, taking care to maintain tension.
- After you’ve formed the central coil, apply some glue to the end of the paper strip and let it dry. Do not remove the coil from the tool.
- Apply adhesive to the coiled coil and then match another paper strip with the end of the first.
- Roll the second paper strip onto the coil while maintaining tension.
- Put some adhesive on the end of the second paper strip.
- Let the glue cure.
- Remove the tight fringe coil from the slotted tool.
Glue Together Your Quilled Shapes
- Arrange the six teardrop petals around the paper coil to create a floral shape.
- Glue the teardrops to both the paper coil and the sides of each teardrop shape.
3.Allow the adhesive to completely cure.
- After the bloom has dried, you will be able to pick it up and it should retain its shape.
affanartandcraft.info
Get DIY project ideas and easy-to-follow crafts to assist you affanartandcraft.info your space .
 . Squeeze the paper coil into a teardrop shape.
 . Make the center of the Daisy.


Post Comment