DIY – How to make a flower mirror using air dry clay

HOW TO MAKE A DIY CLAY FLOWER MIRROR
An enjoyable and creative hobby that lets you add a unique touch to your home decor is making a DIY clay mirror. Here’s a detailed how-to to assist you in creating your own:
Supplies
Air-dry clay (any color will do , however white or other neutral hues work nicely)
rolling pin
A clay cutter or a craft knife
Mirror (round, little, or any other shape you like)
Fine-grit sandpaper
Paintbrushes and acrylic paint (optional)
(Optional) sealant to shield the clay
Glue (a powerful glue that works well with both clay and mirror)
Parchment paper or a protective sheet
Guidelines:
Set Up Your Desk:
To shield your table and stop the clay from adhering, use a protective sheet or parchment paper on your work surface.
Spread the Clay:

Knead a piece of air-dry clay until it becomes malleable and soft.
Roll the clay out to a uniform thickness of about 1/4 inch with a rolling pin. Make sure it’s big enough to fit your mirror’s dimensions as well as any extra border decorations you wish to add.
Slice the Base Form:
Using a craft knife or clay cutter, place the mirror on the rolled-out clay and trace around it, leaving additional room for your design around the edges. This will serve as your foundation.
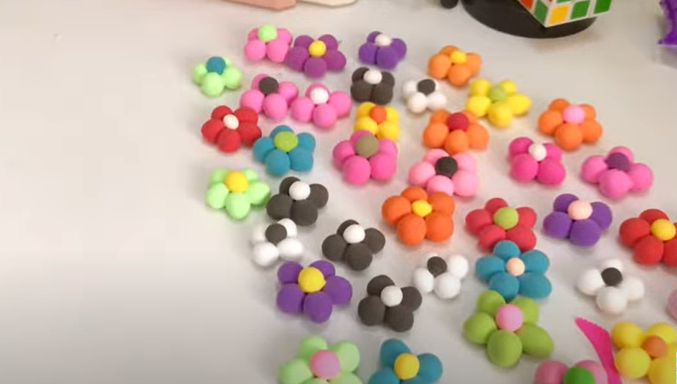
Create the Frame:
Use your imagination when designing your frame. You can incorporate any additional design feature you wish, such as geometric patterns, flowers, leaves, or other shapes made of clay.

You can press designs into the clay using everyday objects like lace, leaves, or stamps to achieve a textured appearance.
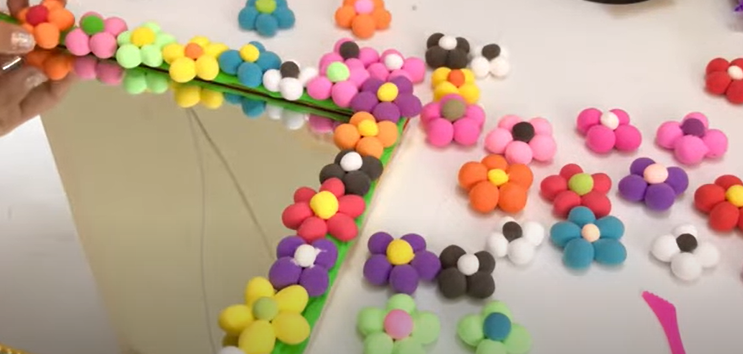
attach the design elements
Press any extra clay pieces firmly onto the clay to join them to the basic frame. If necessary, use a little water to assist the pieces adhere to one another.
Using your fingers or a clay tool, smooth down any seams and uneven edges.
Let the clay dry.
As directed by the manufacturer, allow the clay to dry. Usually, this takes a day or two. Make sure it’s fully dried and solidified before moving on to the following phase.
Optional: Sand and Paint:
After the clay dries, smooth out any uneven surfaces or sharp edges using fine-grit sandpaper.
Use acrylic paints to paint the frame if you like to add color. Permit the paint to fully dry.
If desired, seal the paint and clay with a sealer.
Put the mirror in place:
- Join the Design Components:
Glue the flowers and additional components to the clay foundation. If necessary, use water to make them stick.
7.Allow Clay to Air Dry:
 Give the clay frame a full day
- Optional Sand and Paint:
If you’d like, paint the frame and sand any uneven edges.
- Fasten the mirror:
After adhering the mirror to the clay frame’s core, allow it to fully dry.
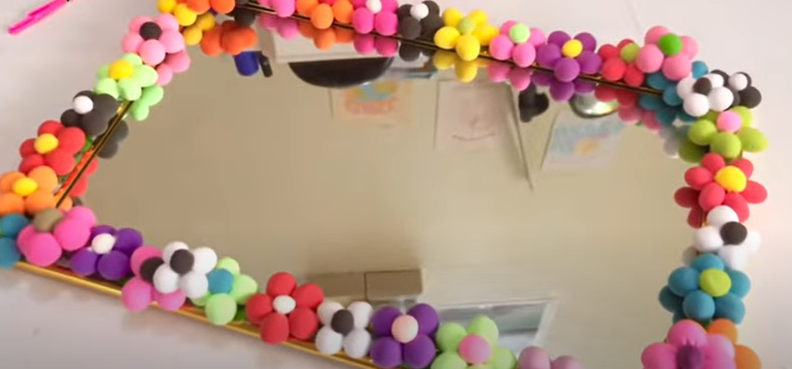
- Show Off Your Mirror:
You may now put your clay flower mirror on show!
Put Your Mirror on Display:
your homemade clay mirror on display. It can be used as a decorative item anyplace in your house or hung on a wall or placed on a vanity.
Savor the beauty of your customized clay mirror!


Post Comment