How to Create a Paper Quilling Ring
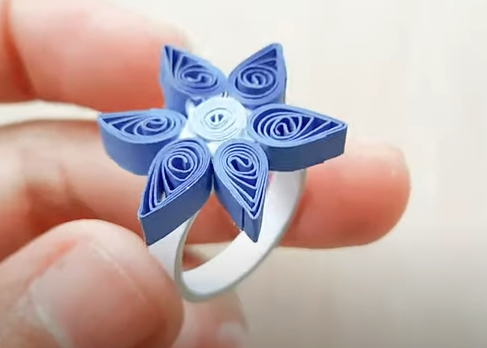
Creating a Paper Quilling Rings:
A Step-by-Step Tutorial
Paper quilling is a centuries-old technique in which strips of paper are rolled into elaborate patterns and decorations. One of the most recent trends in paper quilling is the creation of jewelry, such as rings, earrings, and necklaces. In this post, we’ll walk you through a step-by-step process for creating a gorgeous and distinctive paper quilling ring. This procedure is simple enough for beginners yet allows for lots of flexibility and individuality.
for previous article click the link below
https://affanartandcraft.info/handmade-paper-from-recyclable-materials/
Materials Required for Making a Paper Quill Ring
Before we begin the step-by-step instruction, let’s make sure you have all of the essential items.
– **Quilling Paper Strip**: You may purchase pre-cut quilling strands or make your own using thin paper. The normal size for quilling is 3mm; nonetheless, You may experiment with different sizes.
– **Quilling Instrument**: This is a tool having a tiny slot at the end for rolling the paper strips.
– **Glue**: A strong glue,
– **Varnish/Sealant**: To make the ring waterproof and sturdy, use a clear varnish or Mod Podge.
– **Ring foundation**: Use a metal or plastic ring foundation to support and structure your quilling design.
– **Tweezers** are useful for picking up fragile pieces of paper.
– **Scissors**: Cut paper strips to the required length.
– **Toothpick**: For applying glue accurately to tiny places.
Now that you’ve prepared the supplies, let’s begin the creation process!
Step 1: Select and Prepare Your Design.
Selecting a Correct Shape and Pattern.
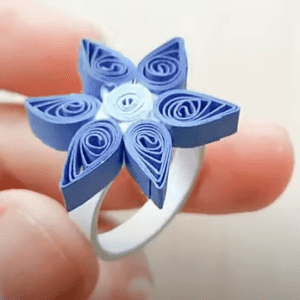
Before beginning, it is vital.select an idea that will look well on a ring. tiny, compact designs are ideal for jewelry since they must be sturdy and not overly cumbersome. You may design your quilling ring with basic circular shapes, flowers, hearts, or geometric designs.
If you’re new to quilling, a simple floral design made using basic forms like coils and teardrops is an excellent place to start.
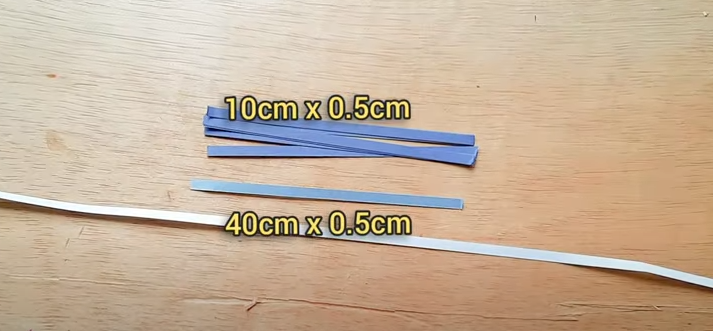
Composing the Paper Strips
Paper strips long will provide for a standard-sized ring, subject to the intricate nature of your design. You may cut your own strips or purchase pre-cut ones.
Choose hues that complement your style. For a more vivid style, utilize contrasting hues or stick to a monochromatic theme for a more elegant design.
Step 2: Start rolling your coils.
Utilizing the Quilling Tool
1. **Begin Rolling**: Place one end of the the quilling process strip in the slot of the quilling tool. Start rolling the strip tight around the tool.
2. **Form a Rigid Coil**: Roll the paper strip firmly to create a basic coil. After achieving the required size, carefully remove the coil from the tool.
3. **Let It Loosen**: Gently loosen the coil between your fingers to create a relaxed, round form. This will be the foundation of your quilling elements.
Secure the Coil
4. **Glue the End**: Once you’ve determined the appropriate size and form, put a little dot of glue to the end of the strip and push it to lock the coil in place.
Use toothpicks or tweezers to apply glue precisely.

Step 3: Trim your coils into desired shapes.
You may construct your artwork using a variety of standard quilling forms. For our ring, we are going to concentrate on creating a basic flower:
Making Petal (Teardrop Shaped)
1. **squeeze the Coil**: After making a loose coil, squeeze one side to make a teardrop shape. This will function as the petals for your flower.
2. **Repetition the Process**: Roll and shape up to six more coils in the same manner to create more petals for your the quilling process flower.
Forming a Central Circle
1. **Make a Tight Coil**: In the center of the flower, make a tiny, tightly coiled coil. This is going to contrast with the bigger, more loosely shaped petals.
2. **Secure with Glue**: As previously, apply a little quantity of glue to the end of the strip and hold it until the coil is securely in place.

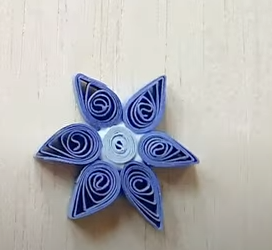
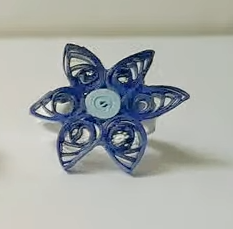
Step 4: Complete the Flower Design
So that you have all of the petals and the center piece, it’s time to put together your flower:
1. **Set up the Petals**: Place the teardrop-shaped petal in a circular fashion around the core tight coil.
2. **Glue the Individual Pieces Together**: Apply a tiny quantity of glue to the edges where the petals meet and the central coil.
3. **Refine the Placement**: Using tweezers, alter the arrangement of the petals until they are uniformly spaced around the center.
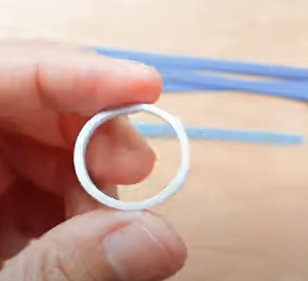
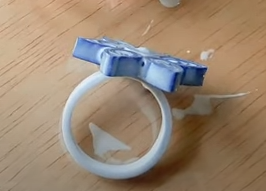
Step 5: Secure the Quilling Designs to the Ring Base
When your flower design is finished, glue it to the ring base:
1. **Apply Adhesive to the Base**: Apply a little amount of strong adhesive to the ring base. Ensure that the surface area is evenly coated, but do not apply too much glue, as it may seep out.
2. **Place the Design**: Gently place your paper quilled flower pattern into the ring base, ensuring it is centered.
3. **Hold in Position**: Hold the design in place for a few minutes to allow the adhesive to solidify. You can use tweezers to grip smaller parts if necessary.
—

Step 6: Harden and Seal the Surface of the Quilling Design.
Since your ring will be worn and subjected to dampness, it is crucial that it be durable:
1. **add a Varnish or Sealant**: After the glue has fully cured, add a layer of clear lacquer or Mod Podge to the whole quilling pattern. This will preserve the paper from water damage and give it a polished, professional appearance.
2. **Let it Dry**: Follow the product’s directions and let the varnish dry fully. It may take many hours.
—
Step 7: Customize and Wear Your Paper Quilling Ring.
Now when the quilling ring is finished, you may customize it further. To personalize your ring, consider adding rhinestones, beads, or metallic paint. You can play with various the quilling process shapes and patterns to make rings for different occasions.
Once you’re satisfied with the finished result, it’s ready to wear! Your paper quilling ring is a lovely, handcrafted item that exemplifies your creativity and dedication to detail.
–
Conclusion:
The Gorgeousness of Handmade Paper Quilling Jewelry.
Making a paper quilling ring is a fun and fulfilling procedure that yields a magnificent, one-of-a-kind piece of jewelry. By following these instructions, you may create a tiny ring that is both fashionable and meaningful.
Whether you’re constructing the ring for oneself, as a present, or to sell, the colors, forms, and techniques may be customized to fit any preference. The best thing is that paper quilling is an eco-friendly and economical pastime, allowing you to create beautiful works without there are several specialized tools.
With enough practice, you’ll be able to try out more intricate patterns and maybe even make complete collections of handcrafted quilled jewelry. Happy creating!


Post Comment